Make your own caramel syrup at home with just 3 simple ingredients. Take your favorite lattes, iced coffee, and cocktails to the next level with this easy recipe. Even better? It’s budget-friendly and has much better flavor than the store-bought stuff.

What’s sweet and buttery and rich and basically the most amazing thing you can imagine making at home for your coffee?! That’s right, homemade caramel syrup is what!
All run-on sentences and obvious statements aside, this caramel simple syrup is truly a thing of miracles. In fact, I didn’t think it could be done. I thought I would just have to have the store-bought variety if I wanted homemade caramel lattes.
Or homemade iced coffee with caramel. Or caramel cold brew. Or…you get the idea.
Since my world was rocked making homemade vanilla syrup for coffee, I knew I had to give caramel a try. And oh boy, my friends, our world was rocked then…get ready for this. World-shaking.
In fact, I made the S.O. an iced caramel latte and he said it was “great, it tasted just like it came from the place…Starbucks…but better.”
And that, from a man of few words, was just the endorsement I needed. So let’s make it, and you, too, can have coffee-shop-worthy drinks right at home, without the price tag.
What is Simple Syrup?
Simple syrup is a liquid sweetener, generally made for use in beverages because it disperses the sweetness throughout the drink without any gritty texture that you might get if you were to just stir in sugar. This is especially key for iced drinks.
It’s typically a 1:1 ratio of water to sugar that is simmered until dissolved into a syrup. The ratio can be changed to make a thicker syrup that would be more like maple syrup or corn syrup consistency for things like pancakes and drizzling.
Simple Syrup can be flavored with a variety of fresh herbs, fruit, and spices – so many delicious options!
Making basic simple syrup is a quick and easy process, and while caramel simple syrup is relatively straightforward and simple, it does require a careful eye and a little more patience, but I promise you it’s totally worth it.
What About Caramel Sauce vs. Caramel Syrup?
You might hear the two terms used interchangeably, but there is a difference and it’s especially important to note because it will change the outcome of your recipe depending on what you use.
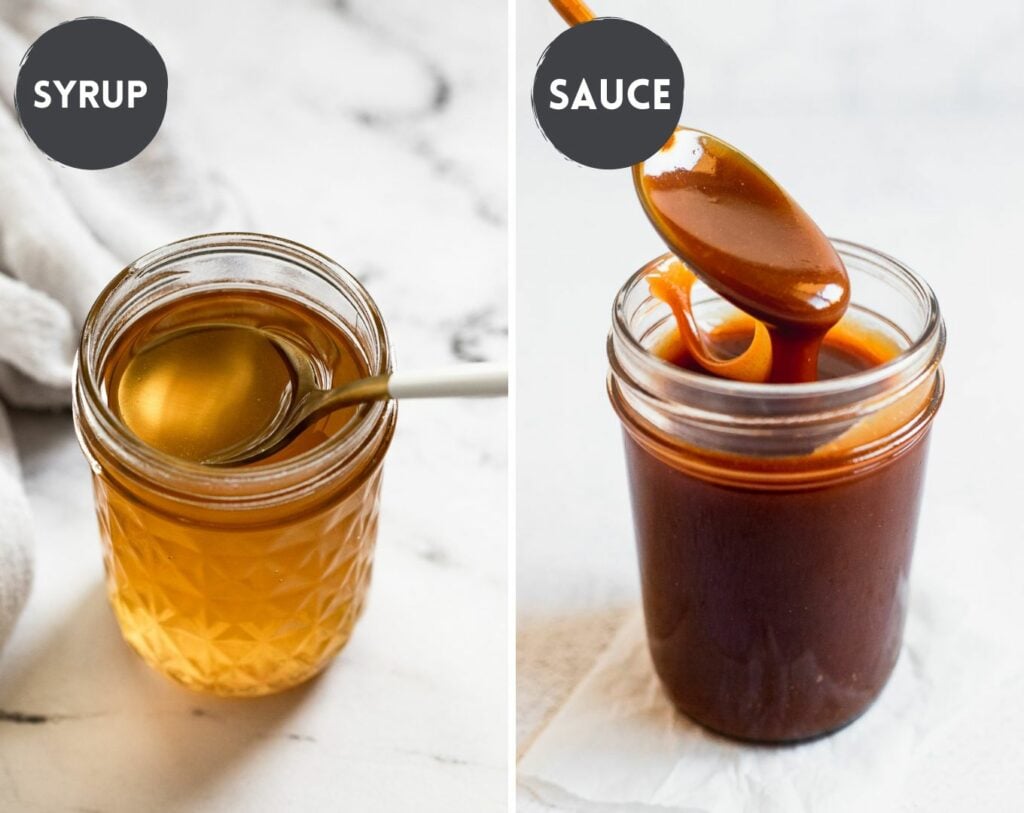
Caramel sauce is thick in texture with a rich flavor from added butter and/or cream. It’s what you’ll typically use to drizzle on ice cream or other desserts. Or hey, even pancakes! It’s also what you’ll want to use for a caramel drizzle on whipped cream (like in these whipped cream photos).
Caramel syrup is thinner and a little sweeter – less rich- than sauce because it is made with just sugar and water (and a little extract). It doesn’t have the same richness because there is not typically butter or cream added. Its purpose is for drinks because it easily dissolves into coffee or tea, infusing it with flavor.
What is Caramel Syrup Made Of?
Ah, homemade caramel syrup is a thing of beauty and few ingredients, friends. While those store-bought varieties might have added ingredients, artificial ingredients, or preservatives, making it at home only requires two ingredients (plus water).

It’s simple and you know exactly what’s going in it! Here’s what you’ll need:
- Granulated Sugar: simple and straightforward!
- Water: this recipe uses a little more water than a typical 1:1 syrup ratio. This is to make sure that the syrup doesn’t actually thicken up too much once it cools, because then we basically have caramel syrup that isn’t great for iced drinks.
- Vanilla Extract: I like adding a little vanilla extract to round out the flavors and give the syrup more depth. If you have it on hand (like, maybe from this caramel cream cheese dip?), use caramel extract for more of a deep caramel flavor. You can also leave it out if you prefer.
Sometimes when making caramel-based recipes (like caramel corn) corn syrup is added to prevent the sugars in the caramel from crystalizing, and keeps the texture smooth. I haven’t found to need it in my many, many batches of caramel syrup making, but if you feel so inclined, add a little drizzle when you start the syrup.
How to Make Caramel Syrup
Typically, making caramel is one involved process, with a huge focus on temperature and time. Luckily, making caramel simple syrup is a little less exact with temperature and time, but it will require your attention so that it doesn’t burn.
Please see the full recipe card below for amounts and instructions.
Dissolve the Sugar in Water & Swirl
To start, there will be more sugar than water to make the caramel base. Dissolve the two together, swirling the pan as needed to “stir”.
There’s a lot of debate around making caramel and whether or not you should stir it. I like swirl because it’s an easy, hands-off way to to make sure the sugars don’t crystalize. Use a pot holder if you need to, and simply lift the saucepan sightly using the handle and gently swirl it around in a circular motion.
There’s no need to do this vigorously, a gentle swirl every now and then is just enough.
Simmer Until Golden Brown
This is where making caramel syrup is a little more involved than regular simple syrup. You need the time for the sugars to caramelize. Typically in basic simple syrup, you remove it once it’s dissolved and call it good.
Now, we will let the mixture simmer on medium-low heat for anywhere from 10 to 16 minutes just until a light golden amber color appears.

I prefer going low and slow as far as time and temperature are concerned because if the sugars burn, there’s not really any going back. Using just under medium heat on my gas stove, it takes around 11 minutes for the golden color to appear. If the temperature is lower, it has taken up to 16 minutes. This is why watching for the color is more important than exact timing.
If you prefer a darker, slightly bitter caramel, you can of course experiment with letting it cook to a darker golden brown. Do note that once it gets to the golden brown point, it can quickly turn too bitter and burnt tasting.
Remove From Heat & Add More Water
Now, this is very important: heat the additional water before adding it to the caramel syrup. This will reduce the splatter that comes from the syrup and make your life a whole lot easier. Just pop it in the microwave before you add it (do this while the syrup is cooking to make things even easier).
I also recommend wearing oven mitts just in case there is extra splatter because it will splatter some.
As you whisk in the heated water, the caramel may slightly harden in bits. If this happens, keep whisking, and if needed, place it back over low heat while whisking until it’s dissolved again.
Then, whisk in the vanilla extract and allow the syrup to cool completely.
Add approximately 2 tablespoons of syrup to your favorite drinks to enjoy!
Salted Caramel Syrup
Ok, so you want to make salted caramel syrup. Good thing that’s as easy as can be! Let the syrup cool slightly so it’s warm, but not too hot, and add salt to taste. Start with a little and continue tasting until it’s just salty enough for your preferences.

Storage
Now that you have homemade caramel syrup, transfer it to an airtight container like a glass jar with a lid and let it cool completely. Store it in the fridge and it will be ready each morning for your coffee.
It will last up to 2 weeks in the fridge, sometimes longer. Flavored syrups do tend to spoil faster than plain simple syrup but still have a pretty significant shelf-life. Check for any moldy spots or an off-smell if you are storing it for a long time.
It isn’t recommended to store homemade syrups at room temperature for longer than a day or two, as they have a higher chance of spoiling and/or crystallizing.
Additional Tips & FAQs
- Worth repeating: watch for the color to change so that you don’t boil it too long.
- Once it’s completely cooled, you can store it in a squeeze bottle (with a lid on the tip) to easily drizzle out the syrup into drinks.
- This syrup is both gluten-free and dairy-free (but as always, check your specific ingredients to be sure).
- Serving size will vary depending on how much syrup you use per drink, etc. This recipe yields a little more than 3/4 cup of syrup. Doubling it to 1 cup sugar will result in about 1 1/2 cups of simple syrup.
- Also worth repeating: adding hot water will greatly reduce the splatter!
Ways to Use Caramel Syrup
Ah, let me count the ways to use this incredible syrup. Of course, it’s mainly for drinks but there are a few unexpected ways you can use it, too!
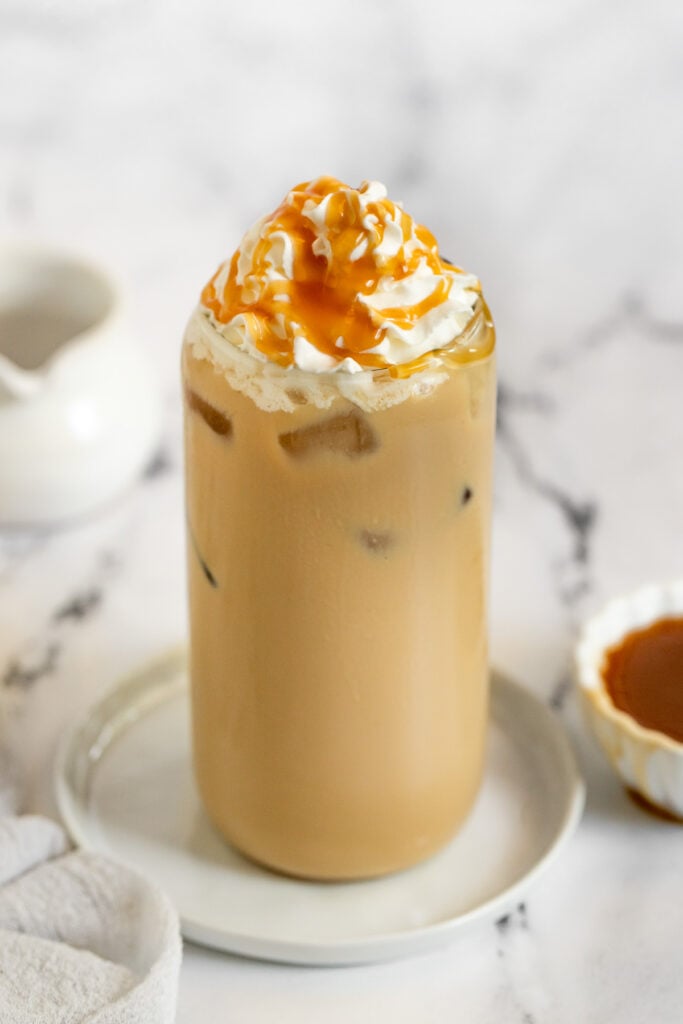
- Hot Caramel Latte or an Iced Caramel Latte
- You can also use it in iced coffee or cold brew drinks
- Stir it in tea, or make a tea latte
- Use it in cocktails – it’s especially excellent in bourbon or whiskey-based cocktails.
- Add it to hot (or cold) apple cider.
- Stir it in warm or cool milk for a kid-friendly drink
- Toss it with mixed berries, drizzle on yogurt with granola, or add it to a smoothie
- Brush on a freshly baked cake for extra flavor
More Coffee Syrup Recipes to Try
- Vanilla Bean Syrup
- Lavender Syrup
- Mint Syrup
- Autumn Spice Syrup (like pumpkin spice, but butter)
Did you make this recipe? Please leave a star rating and review in the form below. I appreciate your feedback, and it helps others, too!

Homemade Caramel Simple Syrup
Equipment
- Mason Jar for storage
Ingredients
- ¾ cup granulated sugar
- 1 cup water divided
- ½ teaspoon vanilla extract
Instructions
- In a medium saucepan, add the sugar and ½ cup water. Heat over medium heat until it begins to simmer, swirrling the pan occasionally by gently lifting and turning in a circular motion.
- Once the sugar is completely dissolved, reduce heat slightly and keep the mixture at a low simmer, continuing to swirl occasionally. Continue to simmer for approximately 10-14 minutes until a light golden amber color appears. If you are simmering on low, it will take around 16 minutes – just watch the color (and keep in mind the pan may influence how the color appears, too).After approximately 10 minutes or so, heat the remaining water in the microwave. Using hot water for the next step will reduce splatters.
- Once the light golden color appears, remove the saucepan from the heat. Wearing oven mitts, carefully whisk in the remaining (hot) water into the caramel syrup; it will splatter so be careful. If any syrup hardens, continue whisking and return to heat if needed until dissolved. Stir in the vanilla extract.
- Allow to cool before transferring to an airtight container. You can use it immediately if needed, but it will heat up iced beverages so mix it with milk or espresso first, before the ice. Store in the fridge for up to 2 weeks and use in your favorite beverages or recipes as desired. Enjoy!
Notes
- This recipe makes just over 3/4 cups.
- Salted Caramel: allow syrup to cool to warm and stir in desired amount of salt; I like to start with 1/4 teaspoon of fine sea salt and add more as needed.
Nutrition
The post Homemade Caramel Simple Syrup (for coffee & more!) appeared first on Fork in the Kitchen.